

How To Assemble Your New Bike

Whether you're looking to purchase a new bike from Sigma Sports or have already placed your order, you can rest assured that your new bicycle will be packaged carefully, and arrive with only minimal assembly required.
Once your order has been placed one of our Cytech qualified mechanics will hand-build your bike leaving only a few minor adjustments for you to do once your new bike arrives. Your mechanic will also complete a rigorous Pre-delivery Inspection (PDI) before carefully re-packing for delivery to you.
We know you'll want to get riding straight away, that is why we've put together the 7 steps below to make sure you're on the road in no time. If you have any questions regarding receiving a bike from us or get stuck at any point in the assembly process be sure to call one of our experts on 0333 006 8833.
Video is unable to play due to Privacy Settings.
Adjust your Cookie Preferences to Opt-in "YES" to "Functional Cookies".
Tools You'll Need
To build your bike you'll only need a few tools.
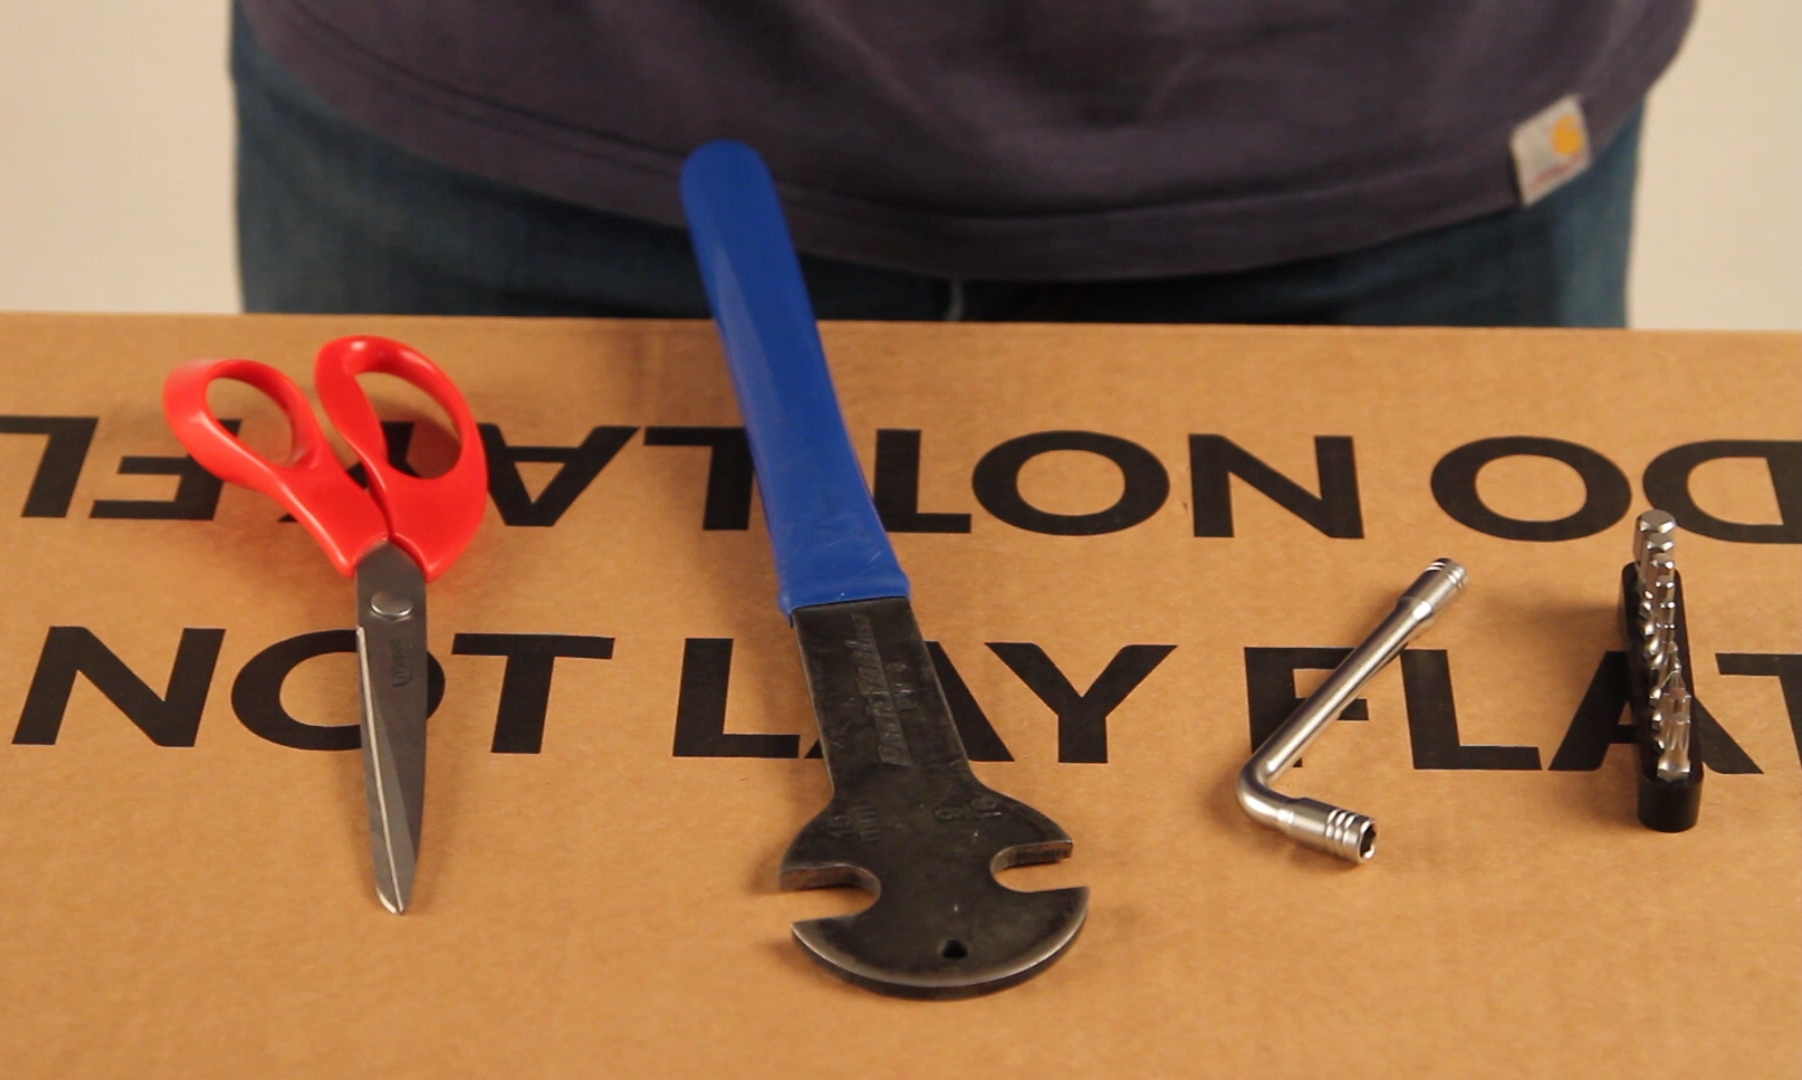
The multi-tool provided with your bike, a pedal wrench or 8mm Allen key, depending on your pedals and a pair of scissors or snips to open the box and cut the zip-ties with.
1. Open the Box and Remove Your Bike
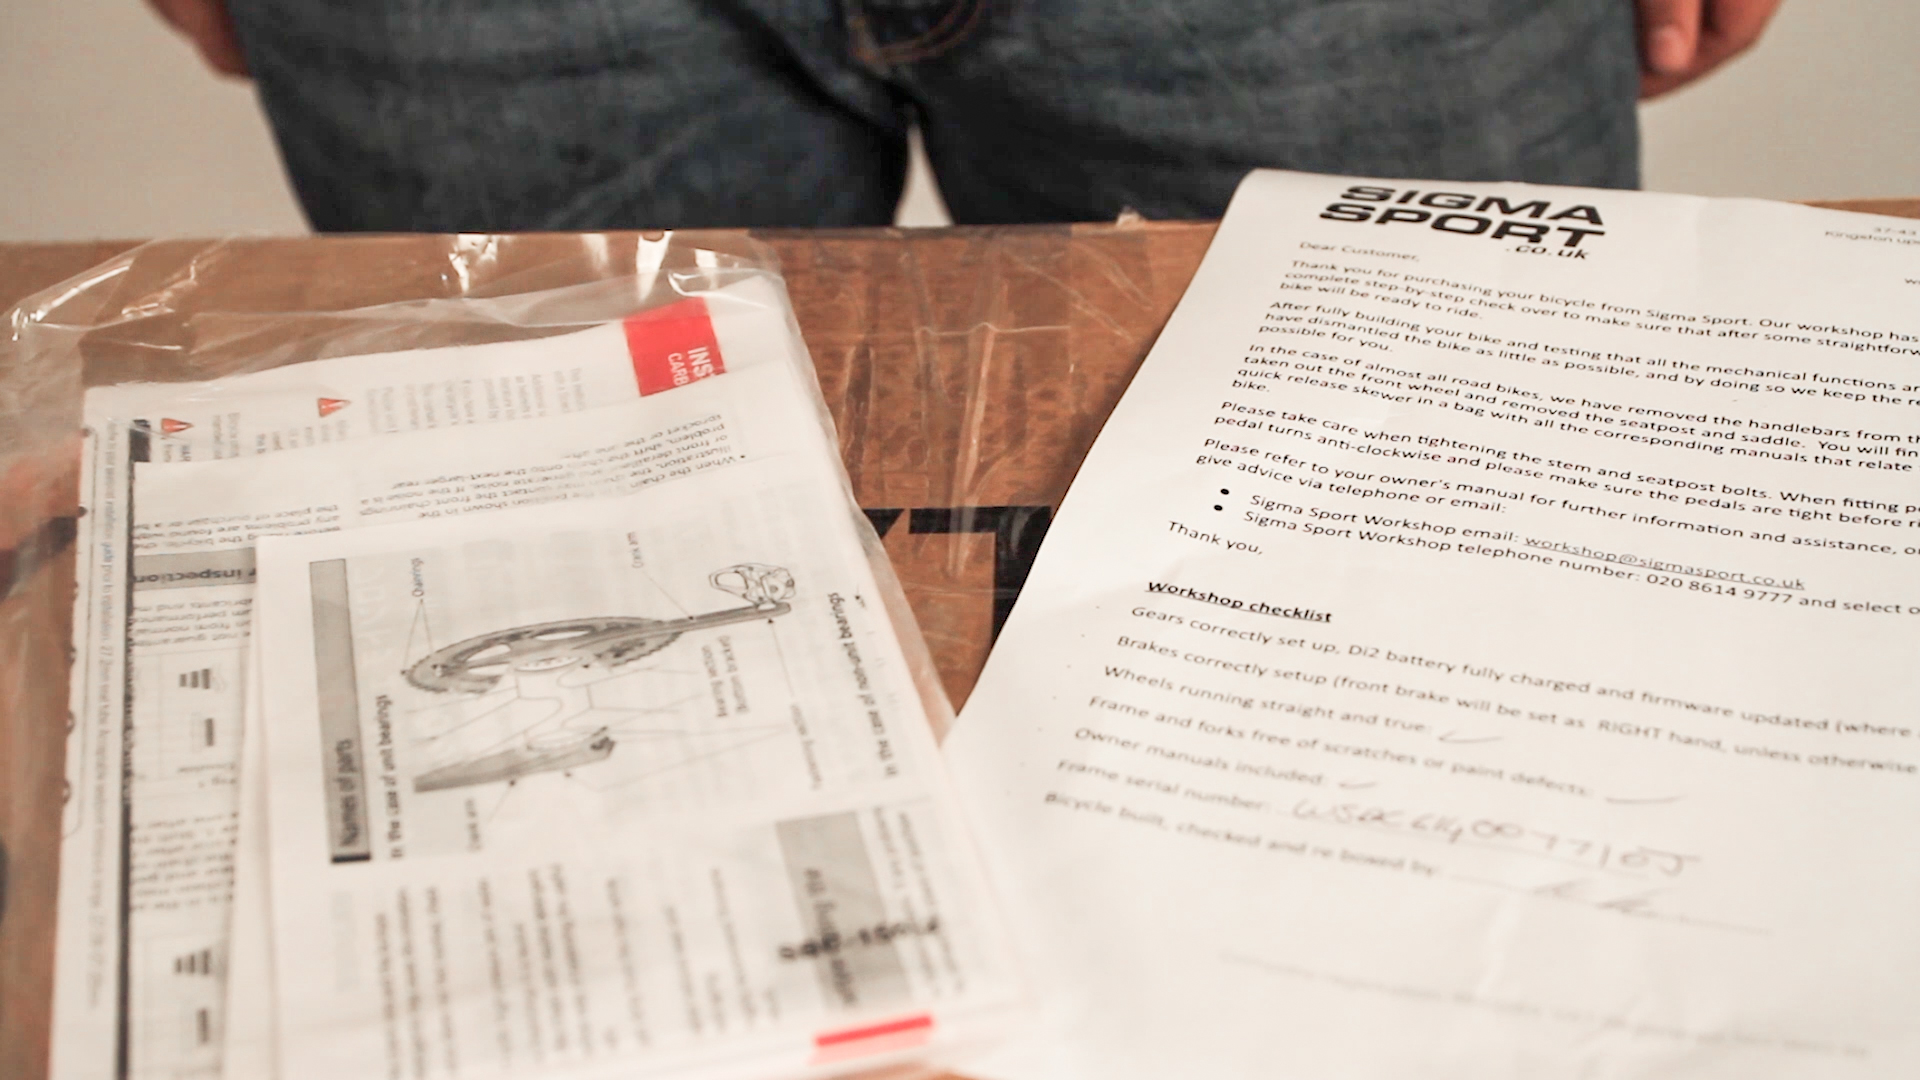
Once you've opened the box you'll find a plastic wallet that contains all of your order information. Manuals can be found on manufacturer websites or elsewhere online. Make sure you keep hold of this info as it contains your bike's serial number and order information.
Carefully remove your bike from the box and remove all of the packaging and zip ties with your scissors or snips.

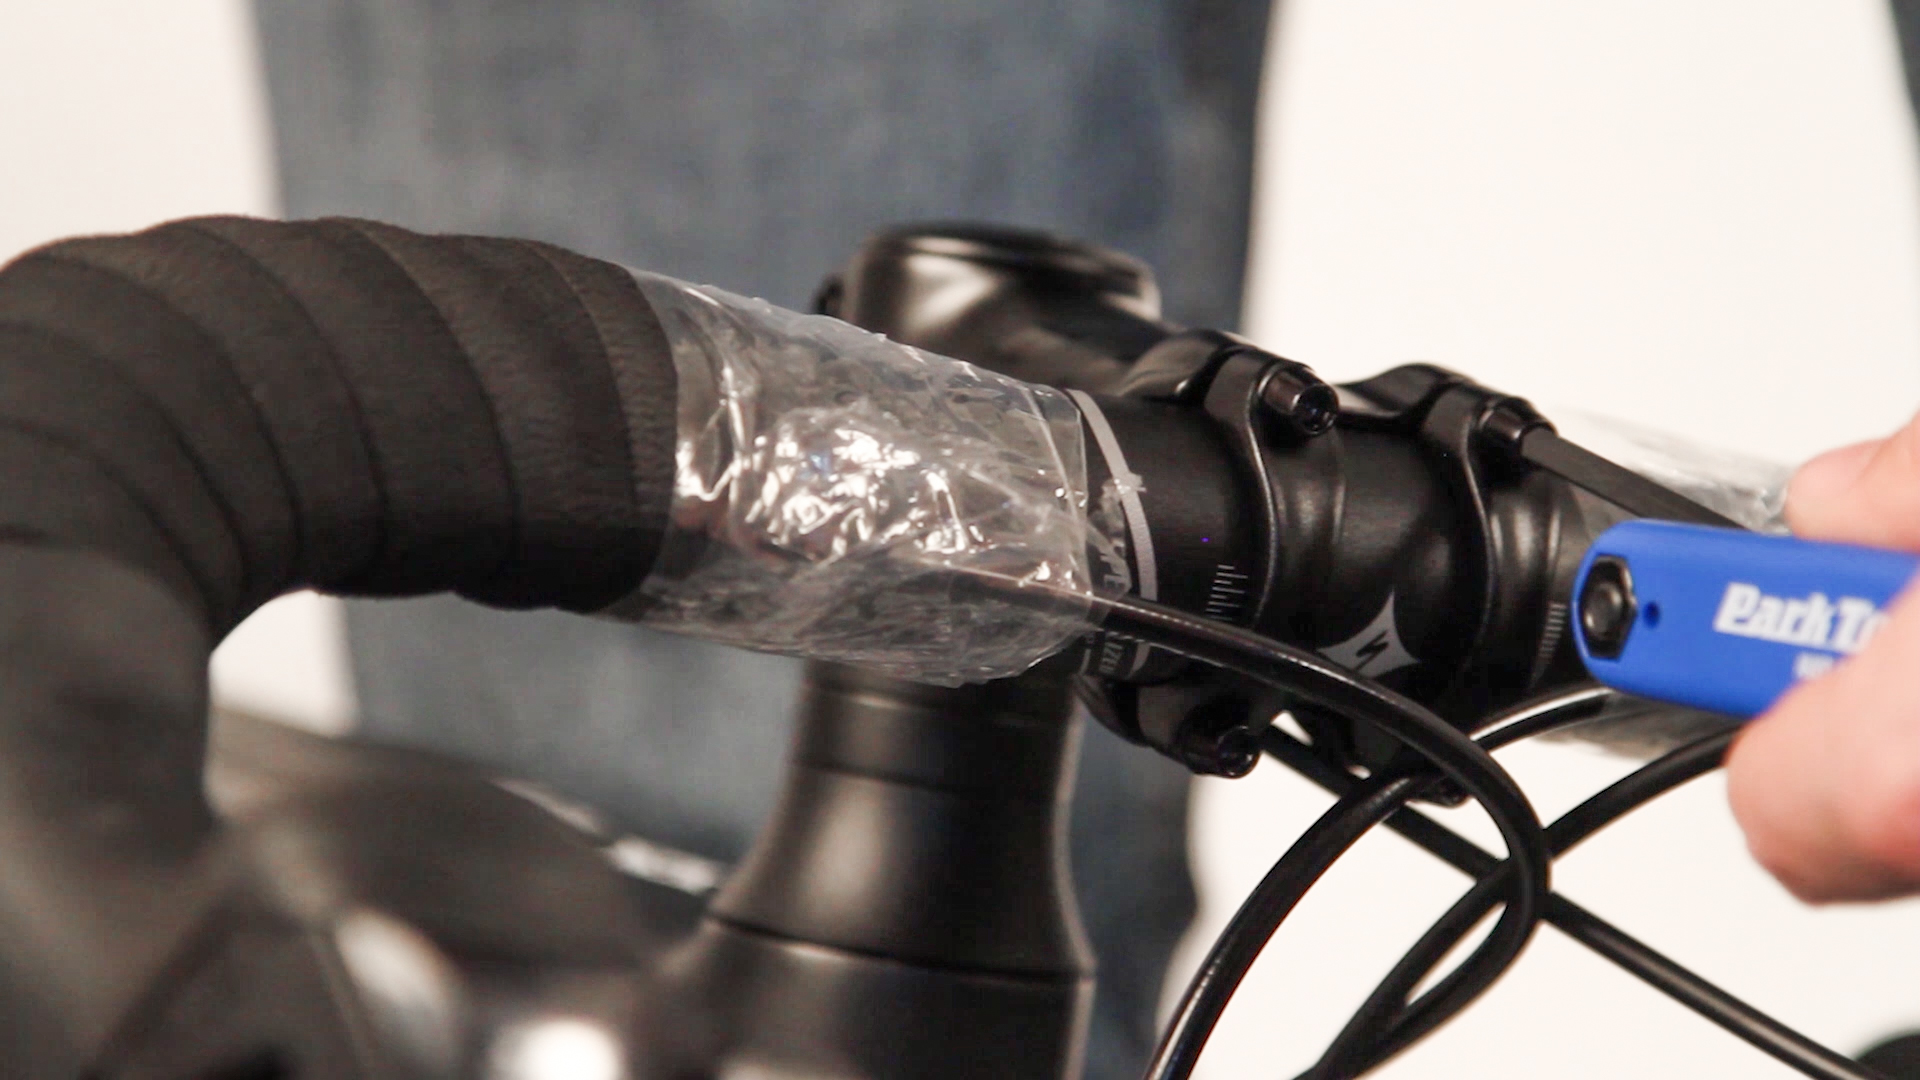
2. Attach the Handlebars
First, let’s attach the handlebars. Using the multi-tool provided with your bike, clamp the faceplate over the bars so that they are fastened securely but not so tight that you cannot change the angle of the bars. The angle of your bars will be adjusted later.
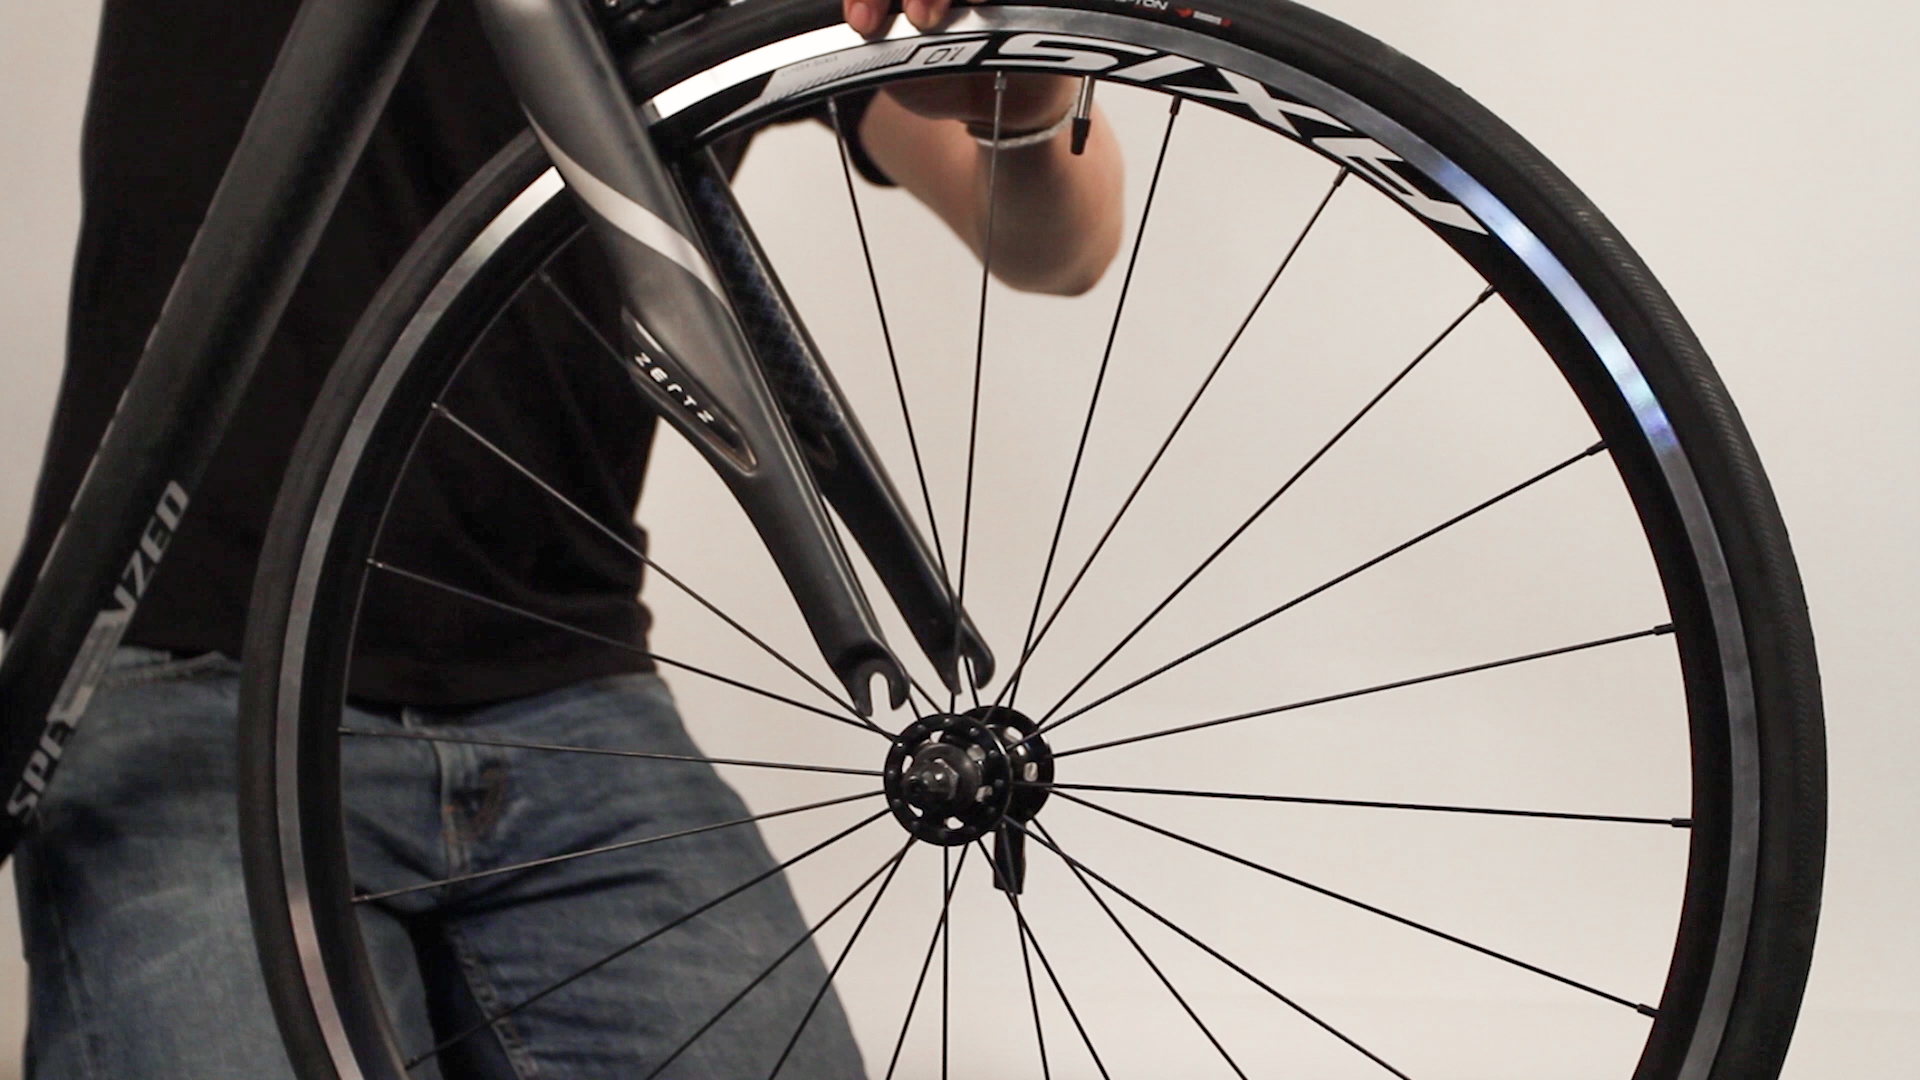
3. Secure Your Front Wheel
Next, it’s time to fit the front wheel. Bikes shipped within the UK will come with the rear wheel installed so all you have to do is slide in the front wheel. First, remove the plastic fork spacer, along with any other packing material.
Set the frame upright on the ground and attach the wheel. Make sure that the brake is properly aligned and that the wheel is sitting straight. Next, tighten the quick release skewer and make sure that the brake quick release is tightened.
4. Adjust Your Handlebars
Now it’s time to finish adjusting the handlebars. Make adjustments to the angle. Note that many models of handlebar have handy measurement markers, allowing you to find your perfect angle.
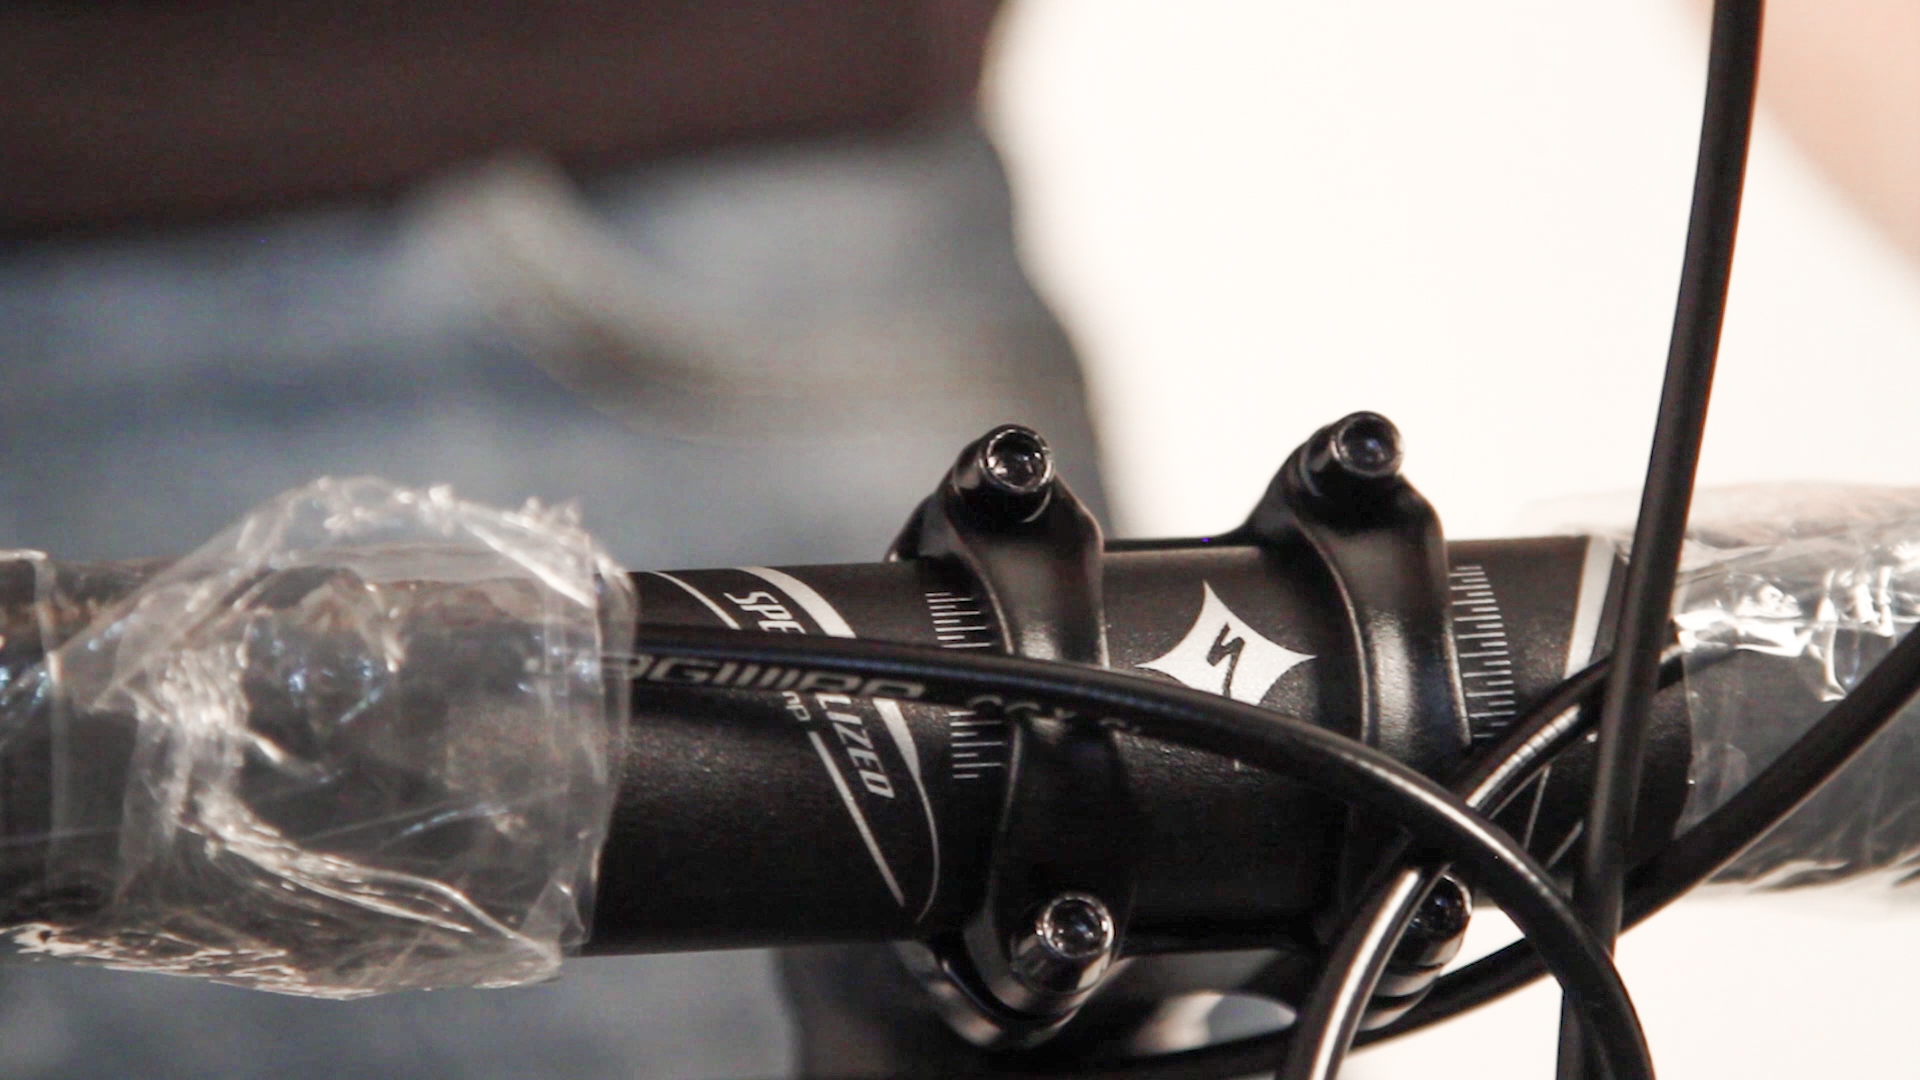
Make sure that all of the faceplate bolts are tightened equally using your Allen key so that there is the same distance between the faceplate and the stem behind all bolts. This will prevent the bars from moving whilst you are out on the road. Note that the stem should already be centralised and tightened by our mechanics.
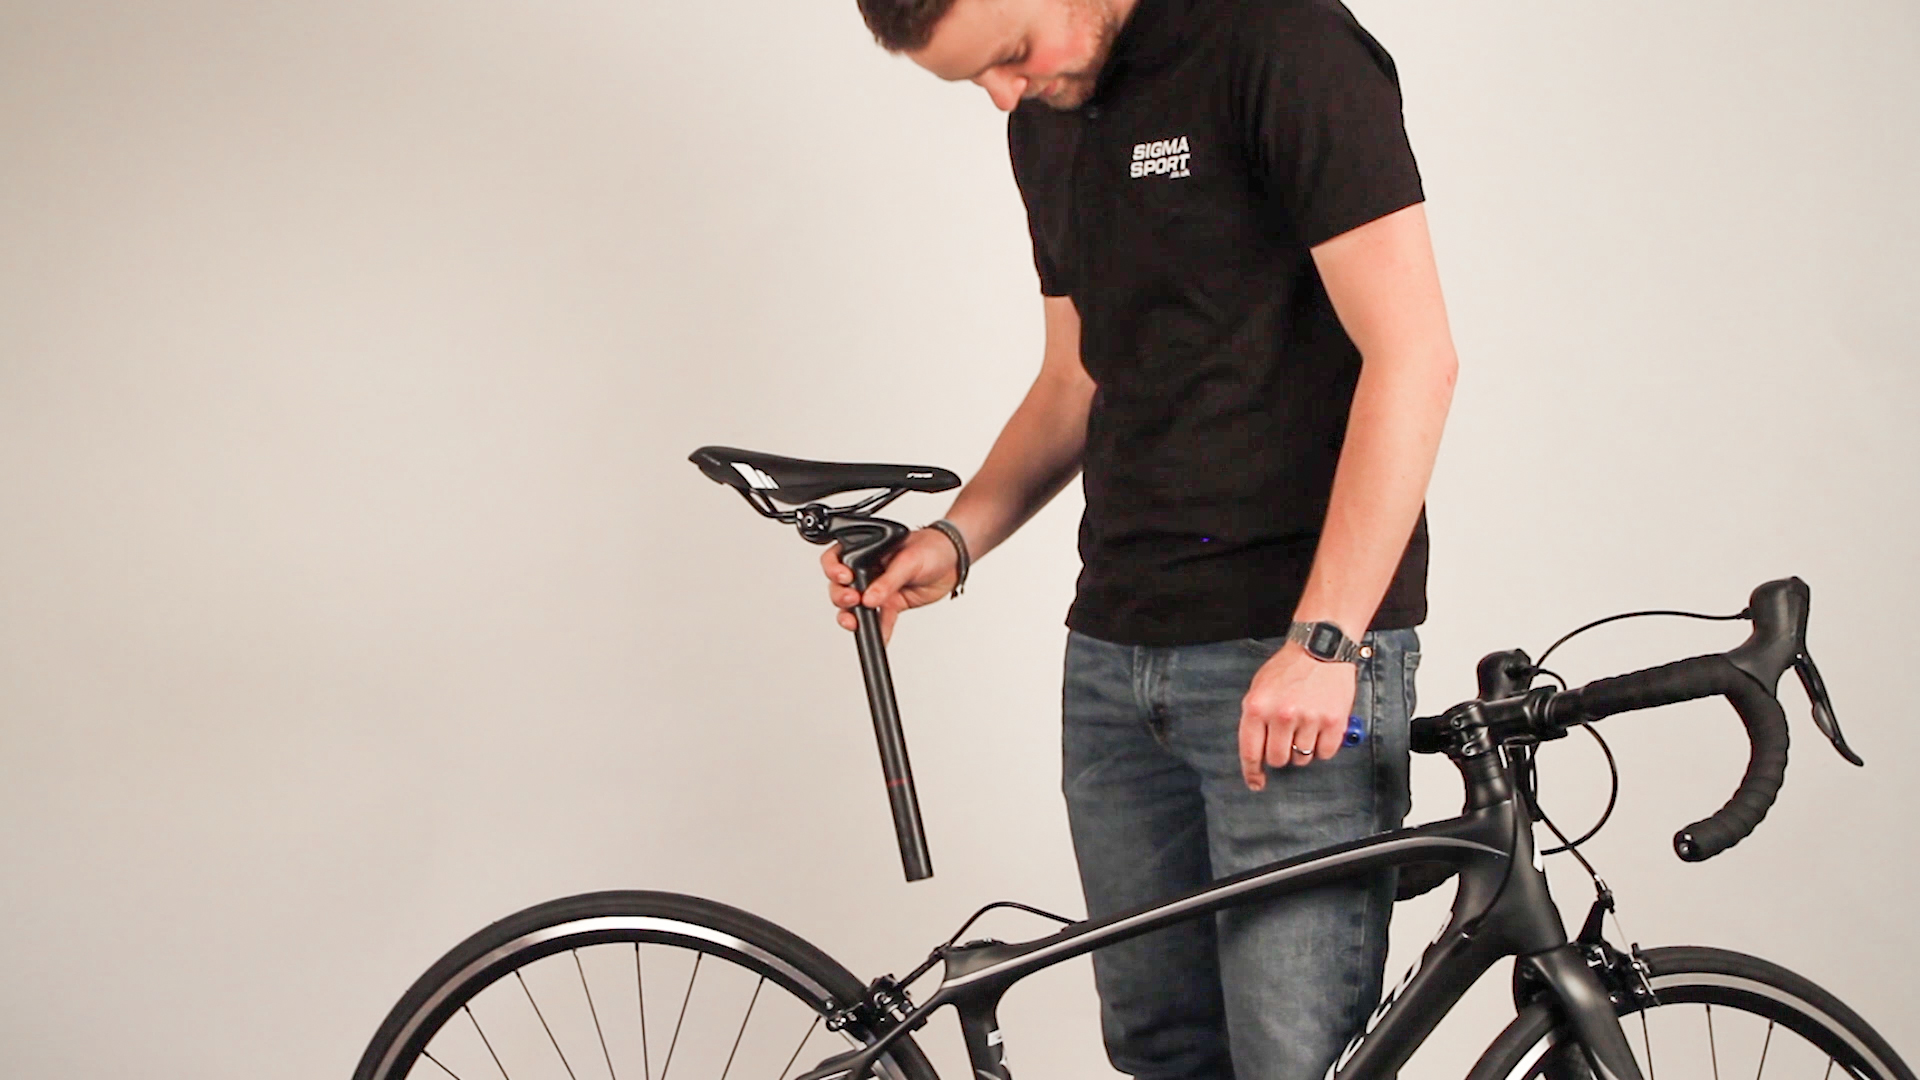
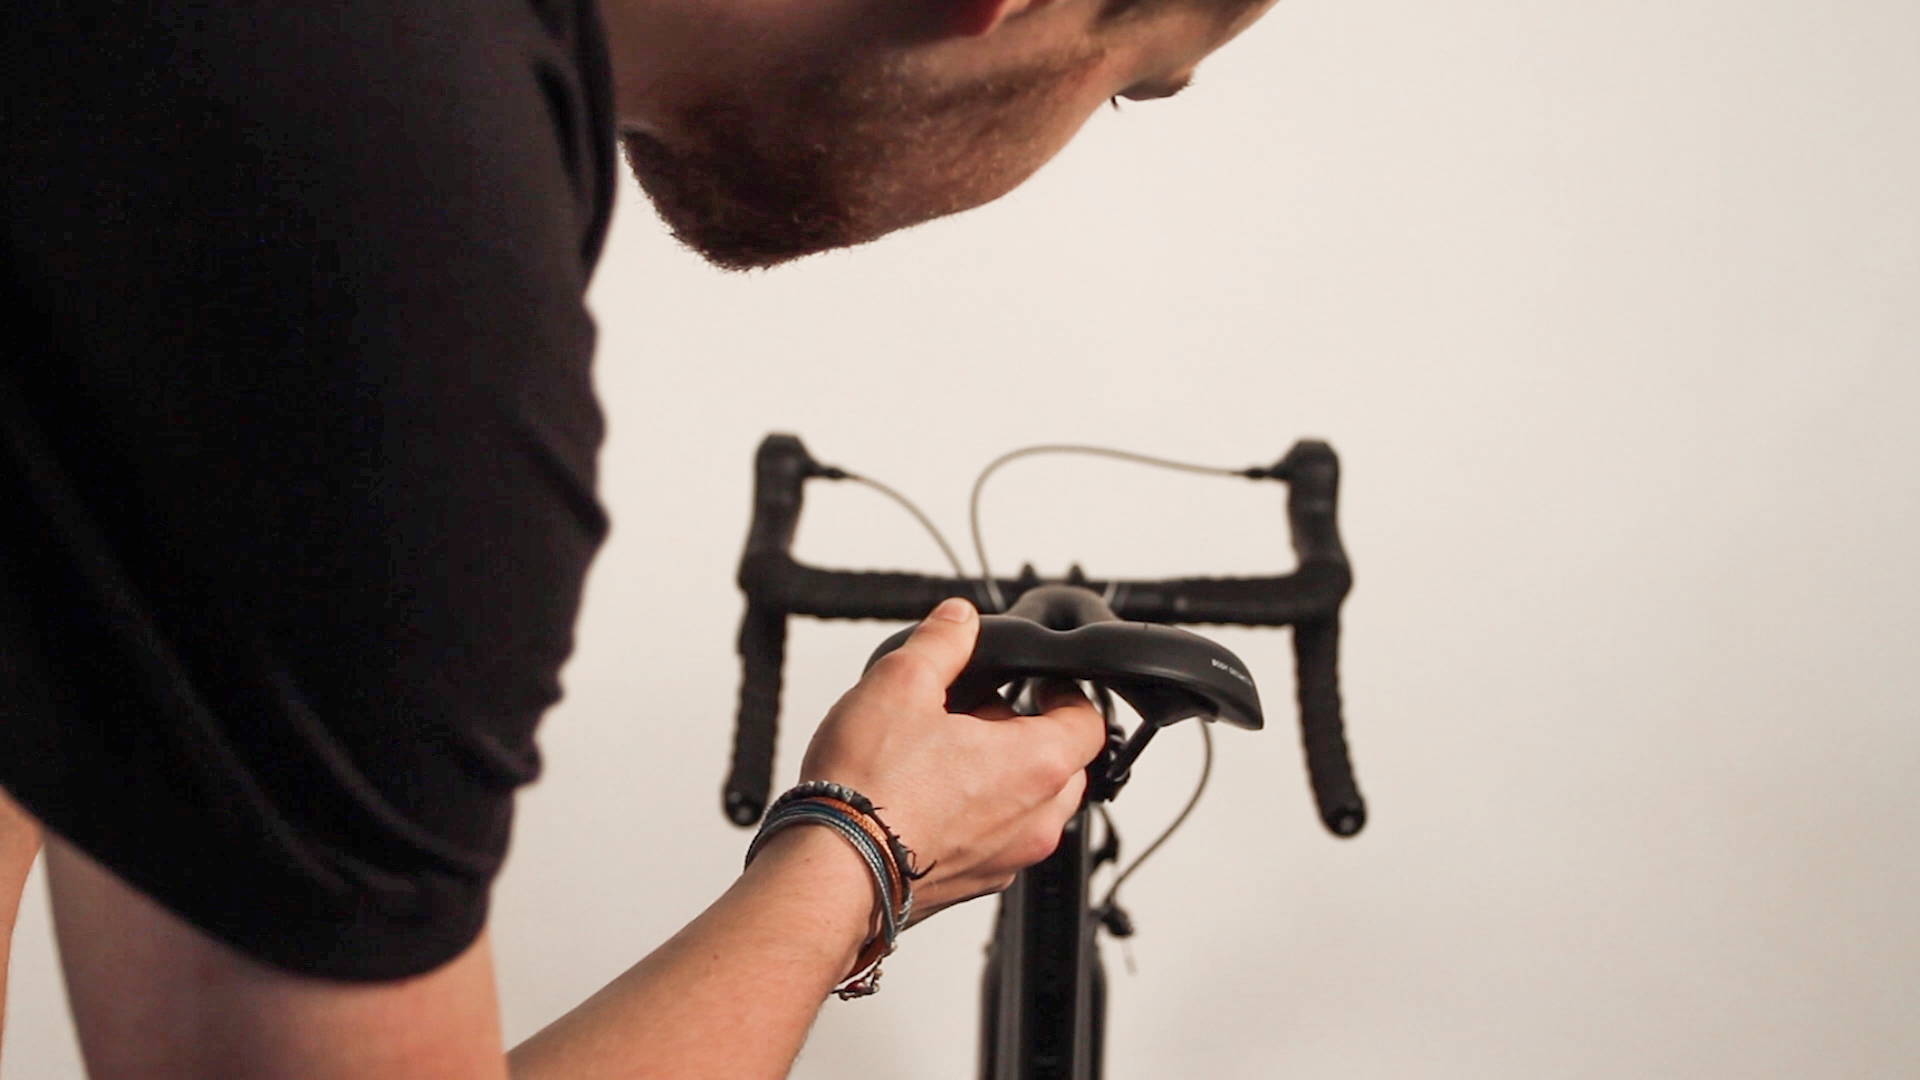
5. Fit Your Saddle
Next up is fitting the saddle. The seatpost has already been greased or pasted so all you have to do is slide the post into the frame at your desired height and tighten the seat clamp using your multi-tool.
6. Fit Your Pedals
Fitting your pedals is easy too. It is important to note that pedal threads are different from left side and right side. The right side pedal has a right-hand thread (removes anti-clockwise, installs clockwise). The left side pedal has a left-hand thread (removes clockwise, installs anti-clockwise). Many pedals are stamped “L” and “R” for left and right. A good way to remember is the pedals thread onto the crank arms the same way the wheels would move when going forward.
- Apply a thin layer of grease onto the threads of both pedals.
- Before mounting the pedals, check the marking on the pedal axles first. “R” stands for right pedal and “L” for left pedal.
- Using fingers, thread the right side pedal into the right crank arm ensuring the pedal threads are lined up with the pedal threads. It is very important to use your fingers, the pedal should thread on easily. If you feel any resistance or stiffness the threads may be cross-threaded. STOP, remove, check you have the correct pedal and try again using your fingers ensuring the pedal threads are lined up. When you have installed correctly with your fingers, use the pedal wrench or an Allen key - pedal dependant, for a snug fit. You can use the opposite crank arm for leverage.
- Repeat process for left pedal, but threading pedal anti-clockwise to install.

Video is unable to play due to Privacy Settings.
Adjust your Cookie Preferences to Opt-in "YES" to "Functional Cookies".
7. Final Checks
Finally give your bike a final check over to ensure your handlebars and seatpost clamp are tightened securely, and also that your brakes' quick releases are in the closed position.
Now you're ready to hit the road!
If you have any questions regarding receiving a bike from us or get stuck at any point in the assembly process be sure to call one of our experts on 0333 006 8833.