


Reduce punctures and upgrade your bike with tubeless tyres.
When it comes to fitting tyres we’re presented with several options; the standard clincher tyre and inner tube combination, the traditional tubular tyre or the new and advanced tubeless tyre. Tubeless and tubular setups eliminate the use of inner tubes, however, it is the former that significantly reduces the risk of punctures, whether it be pinch punctures or those caused by thorns or debris found on the road.
Why choose a tubeless tyre over a clincher tyre, then? The easy answer is that they’re more reliable, and can be lighter in weight when paired with tubeless specific wheels. Tubeless tyres require an airtight rim, removing the need for inner tubes, resulting in a lightweight build in comparison to standard clincher setups. Containing sealant that clogs up any small puncture holes on your rides, a tubeless setup will reduce if not eliminate the time spent on the side of the road fumbling with inner tubes.
Further benefits of tubeless tyres are that they have the ability to roll on pressures as low as 50 to 60 psi (road tyres) and 10 to 20 psi (mountain bike tyres). Advantageous following the trend of wider tyres, which can be found on gravel and adventure road bikes, this offers greater grip and comfort off-road or on rough terrain. Even for road riders, where the benefits may not be obvious, such a system does increase tyre volume for reduced rolling resistance, whilst the lower pressures provide a supple and responsive tyre with excellent grip, especially in the wet. Overall the tubeless tyre is extremely practical for those racing, reducing the chances of abrupt endings due to punctures.
Although not as lightweight as tubular tyres, tubeless tyres offer compatibility with a wide range of clincher rims as opposed to needing specific wheels. So with greater reliability, tubeless tyres prove to be the more appealing alternative to the majority of us who don’t want to waste time fixing tyres or inner tubes.
How to fit tubeless tyres
Bearing all of this in mind, you're probably wondering how to set up tubeless tyres? Don’t fear - we've put together six simple, mess-free steps that you can follow to get yourself riding on air alone.
What you will need

Although tubeless setups have been proven to significantly reduce punctures, it is recommended that you carry a spare inner tube just in case of the most stubborn and non-sealing puncture on the road.
Tubeless rim tape
Most standard wheelsets can be converted through the use of rim tape. This is essential for rims that are not tubeless ready to stop any sealant leaking through drill holes, preventing a pretty sticky mess. Some wheel manufacturers will sell rim strips specifically for their rims to cover the spoke nipples and drill holes, which is always worth researching before buying tape. If however your wheelset is tubeless specific, you can save yourself a job, as rim tape is simply surplus to requirements.
Tubeless tyres
You will need tubeless specific tyres, as the sidewall and beading on standard clincher tyres is not stiff enough to hold its shape and seal against the rim. This means that they are harder to fit and also raise the risk of the tyre slipping off when running low psi or in the unfortunate case of a puncture. Specialized offer a great range of tubeless tyres under their 2Bliss range and at great value, such as the Roubaix Pro 2Bliss Ready Tyre (road bikes), and the Terra Pro 2Bliss Tyre (cyclocross/ adventure road).
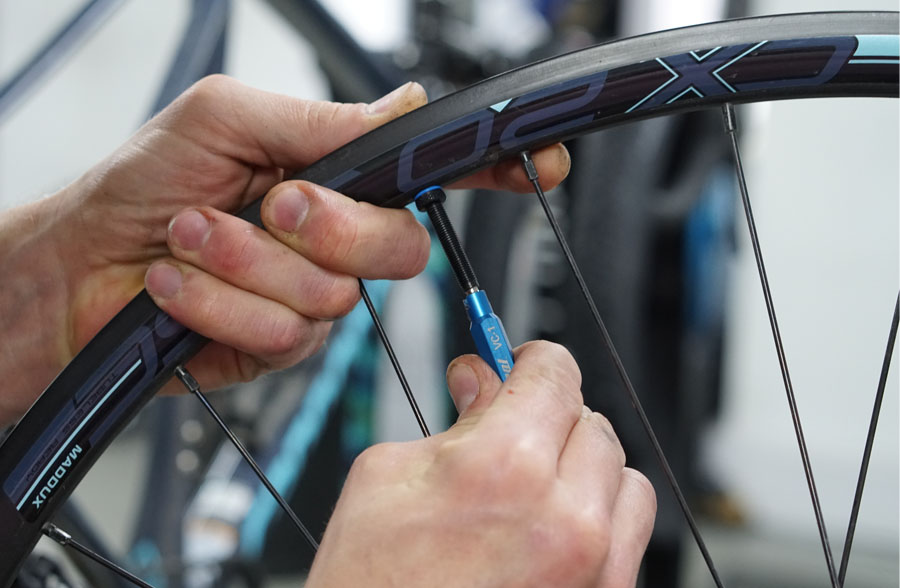
Two tubeless valves
Be sure to purchase the right valves to suit your rims; most manufacturers will recommend or supply their own tubeless valves.
Bottle of tyre sealant
A reliable choice is Stan's NoTubes Tyre sealant, however, there are many other options out there.
Track pump
It is recommended you use a tubeless specific track pump with a pressurised preload such as the Bontrager Tubeless Ready Flash Charger Track Pump to mount your tubeless tyres.
Top tip: Setting up tubeless tyres for the first time can be a bit messy, so keep some old rags or a cloth aside and wear old clothes in case of any unwanted sealant spray or spills.

① Prepare your wheel

For owners of tubeless wheelsets, you can jump to step four. For those of us who have standard wheelsets with drill holes for spoke access, you will need to remove your previous tyres, tubes and rim tape. Prepare your rim by using soapy water or alcohol cleaner, to wipe away any dust and grit from the internal rim surface. It is crucial that all the contact points for the rim tape and tyre are squeaky clean and dry for a successful seal.
② Make the rim airtight

To avoid any air escaping through drill holes in the rim you will need to make it airtight and this can be done in two different ways.
Rim tape
To apply your rim tape, start a spoke hole away from the valve hole. Keeping the rim tape taut, begin sticking the rim tape down against the rim, smoothing with a cloth. Make sure to clear out any air bubbles and cover all holes to prevent any air loss or sealant loss. Some manufacturers recommend two layers of tape to ensure a secure seal around the rim, so be sure to double check the guidelines in your wheelset’s and rim tape’s manual. Once you have wrapped the rim tape around the rim, you will need to use a sharp tool to pierce a hole through the tape where the valve will sit.
Rim Strips
For those using the manufacturer's rim strips specifically for tubeless conversions, this is pretty straightforward. Stretch the rim strip over the rim, making sure to align the strip's valve hole with the rim's valve hole. Whilst placing the strip over the rim it helps to keep it taut whilst smoothing it down along the rim, making sure it is seated securely.
③ Fit valve and half of the tyre
There are a couple of ways you can fit a tyre and sealant to a tubeless setup. We recommend fitting the tubeless valve first, making sure the rubber footing of the valve has a firm and definite seating against the rim. Whilst holding the valve in place, use the valve's lock ring to secure it. Fit half of your tyre onto the rim and then you're ready for the next step.
Top tip: If you are struggling to seat your new tubeless tyre on your rim, we suggest inflating them with an inner tube on the rim so that the tyre and beading takes shape and seats correctly. Once this is done you can pry half of the tyre off of the rim, remove the inner tube and fit the valve.
④ Seat tyre and pour sealant

Now your wheel is ready for the sealant. Fit 3/4 of the tyre onto the rim, leaving an opening opposite the valve. Make sure the tyre has seated properly within the rim to eliminate the risks of unwanted surprises. Give your sealant bottle a good shake to make sure it is mixed, and pour 35ml into the opening of the tyre bead and the rim. Carefully rotate your wheel so the sealant has moved away from the opening. You can now fit the rest of the tyre with less mess.
Once the tyre is fully seated you can rotate the tyre gently to spread the sealant around the rim and tyre, this will speed up the sealing process and make sure any small air pockets are plugged.
⑤ Inflate the tyre

Inflate your tyres to the maximum recommended tyre pressure, using a tubeless specific track pump or CO2. This will help accomplish a speedy and successful seal. If you do not have one of these, you can use a standard track pump, but ideally, this will need to be done with speed, If you have a truly airtight seal and plenty of patience this will be successful.
⑥ Check your pressure

Finally, we recommend leaving your tyres for at least an hour, ideally, overnight before riding. If the tyres are struggling to hold any pressure, redo the process from step five (save the sealant you have already used). It’s not unusual for tubeless tyres to lose some pressure in the process of sealing. If this is the case, re-pump your tyres to the recommended pressure and then you're ready to set off on your adventures.